Monday, August 29, 2016
No post until September 12th!
We've been on the go the last couple of weeks and the travel will continue another week or so. Due to this, the next blog on building a run-in shed will come out on September the 12th. Sorry for the delay!
Monday, August 15, 2016
Sauce Maker Appliance makes quick work of tomatoes!
This year I updated some of my appliances for preserving food. One of the purchases was the Ball FreshTech HarvestPro Sauce Maker. This is the EASIEST thing to use and makes very quick work of skinning, de-seeding and juicing tomatoes!! It is also easy to clean as well. I can highly recommend adding this to your arsenal of kitchen appliances.
I have no financial interest in this product or this company, I am just relating my wonderful experience with it. I purchased it on sale at the beginning of the season (in May) for $99.99. Regular price is $149.99. Here's the website:
http://www.freshpreserving.com/ball-freshtech-harvestpro-sauce-maker-1034049VM.html#start=1
You simply wash the whole tomatoes, core and cut them into quarters and heat in a pan. Once heated thoroughly, you put them into the sauce maker and process. 6 quarts of juice took me MAYBE 30 minutes to process! That included heating the tomatoes to begin with!
The above photo shows the how easy this appliance is to operate! You place the cut up, heated tomatoes into that top bin. Place your "scraps" bowl (seed and skin bowl, which is my white bowl here) at the end, place another bowl under the juice "spout" as shown (glass bowl here) and turn on the sauce maker! VERY quickly, you've got your juice ready to can or cook with! The appliance also has a larger setting, for allowing chunks of tomatoes, onions, etc to come through. I have not tried that setting yet, so can't comment on how well that works.
The left over scraps, I feed to our chickens. They LOVE this stuff! I'm sure pigs would like this too.
I've found this addition to our kitchen to be very, very helpful and well worth the cost! Canning season is slowing down for us here in the south. Now it's beginning to cool off a bit. Next blog will begin a series on putting up your own small barn or run-in shed. That will come out August 29th. I hope you are enjoying your summer and are having a great canning season!
 |
| The HarvestPro Sauce Maker. LOVE this kitchen appliance! |
 |
| The sauce maker assembled. |
I have no financial interest in this product or this company, I am just relating my wonderful experience with it. I purchased it on sale at the beginning of the season (in May) for $99.99. Regular price is $149.99. Here's the website:
http://www.freshpreserving.com/ball-freshtech-harvestpro-sauce-maker-1034049VM.html#start=1
You simply wash the whole tomatoes, core and cut them into quarters and heat in a pan. Once heated thoroughly, you put them into the sauce maker and process. 6 quarts of juice took me MAYBE 30 minutes to process! That included heating the tomatoes to begin with!
 |
| Box of tomatoes bought from the local farmer's market for $10! |
 |
| Sauce maker in action. |
The left over scraps, I feed to our chickens. They LOVE this stuff! I'm sure pigs would like this too.
 |
| Scraps neatly contained and ready to carry out to the chickens! |
I've found this addition to our kitchen to be very, very helpful and well worth the cost! Canning season is slowing down for us here in the south. Now it's beginning to cool off a bit. Next blog will begin a series on putting up your own small barn or run-in shed. That will come out August 29th. I hope you are enjoying your summer and are having a great canning season!
Monday, August 1, 2016
A couple of quicker and easier ways to freeze sweet corn!
If you've ever had fresh sweet corn from the garden, you are probably hooked and willing to work to freeze it yourself for use this winter! It tastes SO much better than the store bought cans of kernel corn. Normally, most articles you read will tell you to blanch the corn first, before cutting it off the cob and freezing it. Wouldn't it be nice to be able to just freeze it WITHOUT blanching?? Think of the time you would save!
Years ago, my mom tried freezing corn-on-the-cob without blanching and it worked just fine! In fact, we enjoyed the texture of it better than blanched corn that was frozen. The unblanched frozen corn (to us anyway) resembled the texture and taste of fresh corn more accurately than the blanched frozen corn did. From everything I've been able to read and question, unblanched frozen corn does not seem to pose a safety concern either.
There are 2 methods that I've used myself. The first is the absolute quickest and easiest. Take your sweet corn, wrap it in aluminum foil to completely cover it (WITH the shuck still on!) and throw it in the freezer! When you get ready to cook it, loosen one end of the foil and loosen the pointed tip of the shuck, run a little cool water into the end of the corn, then wrap the foil back up and place it on the grill to cook. OR you can take the foil off, loosen the pointed end of the shuck and run the cool water in, wrap the corn in a paper towel and cook it in the microwave for about 5 minutes. Be careful when you remove the shuck! It will be HOT and steamy!
The other method I've tried of freezing corn without blanching is a bit more time consuming (because I cut it off the cob), but it tastes just as good! Just shuck the corn, clean all the "hairs" off the corn, wash the cob in cool water, then cut the corn off the cob, spoon the corn kernels into a freezer container and freeze!
If you've read my previous blogs, you'll remember that I have RA now (rheumatoid arthritis). It's harder for me to use my hands in a physical way. Cutting the corn off the cob is hard for me to do with just a knife. I started looking around and I found THE best device to cut the kernels off the corn cob! It's currently priced at $9.99 and comes from Carol Wright Gifts. I know, you're thinking it won't be sturdy (it is made of mostly plastic). Well, I've finished putting up our sweet corn this year and it held up just fine and is stored away now, waiting for use next season! Here's the link to the corn cutter's page (they call it a corn stripper):
http://www.carolwrightgifts.com/corn-stripper/80342.cfm?key=5G00236B&cm_mmc=PaidSearch-_-GooglePLA-_-FreeShip-_-80342&gclid=CJus7MXKh84CFdU6gQod6WEOAg
Here are some pictures of it. It's EASY to use, easy to clean, keeps the kernels from going all over the place and works for both uncooked AND cooked corn on the cob!
 So now, you have left over husks and cobs with most of the corn cut off of them. What do you do with this stuff? If you live on a farm, feed it to your livestock! Pigs LOVE this stuff, cows like it too and some horses like it, as well as your chickens! You may need to cut up the cobs into smaller bites for the horses, chickens and pigs. I feed it to the horses like a treat. Most of them really like it, but there are a couple that turn their noses up at it! For our full sized horses, I cut the cobs into pieces that are about 2 inches long. For the miniature horses, I then cut that 2 inch long piece into halves (much easier for them to chew). For the chickens, I then cut that 2 inch long half piece into half again. As for the husks, I just put them out on the ground and let them forage through them. Horses can be picky about the husks especially! Our Saddlebreds won't eat them. The Arabians love them. The miniatures have to be in the mood to eat them! LOL It's safe for them to eat. Just don't feed them too many husks or cobs at once. I limit the full sized horses to 2 cobs each/per day. The minis get less than that. If you have a horse that has foundered, probably better to not give them any cobs at all.
**Important Reminder!** If you save the cobs to feed to livestock later on (more than a day later), be sure to keep the cobs in the refrigerator. They can (and will) mold if left at room temperature for over a day. NEVER feed molded cobs to any livestock. It can make them sick.
**Another important reminder!** Never feed anything to someone else's animals, without their permission. Meaning, if you live next to livestock, do NOT just throw this stuff over the fence. You can make the animals very sick. Some of them can be allergic to certain foods, just like you are! ALWAYS ask the owner first, if it's OK to give something to their animals. PLEASE, YOU MUST ALWAYS ASK FIRST!!
That's it for this blog's helpful, time saving hints! Next blog will look at another new appliance I added to the food preserving line-up this summer, a sauce maker! I love it too! Until then, happy freezing and canning! (Next blog due out Monday August 15th.)
Years ago, my mom tried freezing corn-on-the-cob without blanching and it worked just fine! In fact, we enjoyed the texture of it better than blanched corn that was frozen. The unblanched frozen corn (to us anyway) resembled the texture and taste of fresh corn more accurately than the blanched frozen corn did. From everything I've been able to read and question, unblanched frozen corn does not seem to pose a safety concern either.
There are 2 methods that I've used myself. The first is the absolute quickest and easiest. Take your sweet corn, wrap it in aluminum foil to completely cover it (WITH the shuck still on!) and throw it in the freezer! When you get ready to cook it, loosen one end of the foil and loosen the pointed tip of the shuck, run a little cool water into the end of the corn, then wrap the foil back up and place it on the grill to cook. OR you can take the foil off, loosen the pointed end of the shuck and run the cool water in, wrap the corn in a paper towel and cook it in the microwave for about 5 minutes. Be careful when you remove the shuck! It will be HOT and steamy!
The other method I've tried of freezing corn without blanching is a bit more time consuming (because I cut it off the cob), but it tastes just as good! Just shuck the corn, clean all the "hairs" off the corn, wash the cob in cool water, then cut the corn off the cob, spoon the corn kernels into a freezer container and freeze!
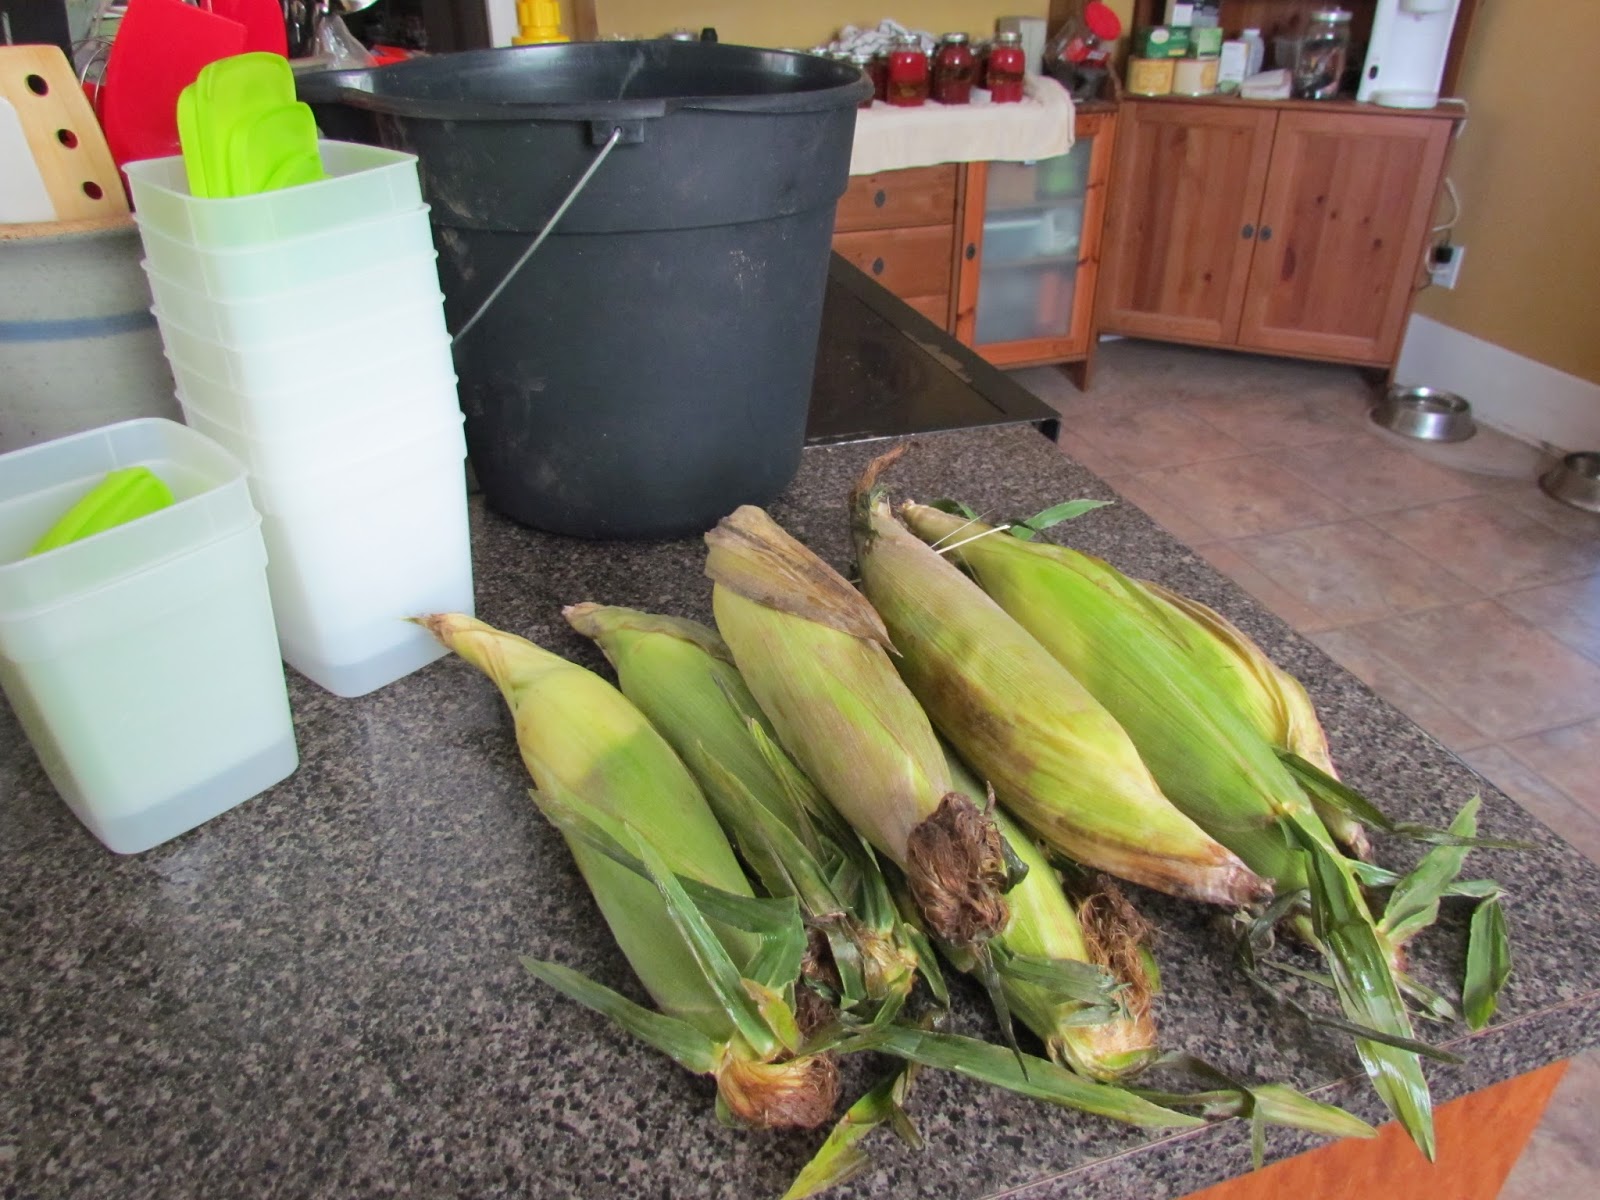 |
| Corn-on-the-cob with it's shucks still on. |
 |
| The "hairs" that need to be removed from the corn before cutting it off the cob. |
If you've read my previous blogs, you'll remember that I have RA now (rheumatoid arthritis). It's harder for me to use my hands in a physical way. Cutting the corn off the cob is hard for me to do with just a knife. I started looking around and I found THE best device to cut the kernels off the corn cob! It's currently priced at $9.99 and comes from Carol Wright Gifts. I know, you're thinking it won't be sturdy (it is made of mostly plastic). Well, I've finished putting up our sweet corn this year and it held up just fine and is stored away now, waiting for use next season! Here's the link to the corn cutter's page (they call it a corn stripper):
http://www.carolwrightgifts.com/corn-stripper/80342.cfm?key=5G00236B&cm_mmc=PaidSearch-_-GooglePLA-_-FreeShip-_-80342&gclid=CJus7MXKh84CFdU6gQod6WEOAg
Here are some pictures of it. It's EASY to use, easy to clean, keeps the kernels from going all over the place and works for both uncooked AND cooked corn on the cob!
 |
| The corn cutter/stripper assembled and ready to use. |
 |
| Corn cob placed in the cylinder, getting ready to cut the corn off. |
 |
| Before you place the cob into the cylinder, make sure the end is flat. Otherwise, it won't seat itself properly and will make the process difficult (if not impossible). Just take a knife and cut this end off. |
 |
| Place the metal hollow "rod" over the end of the cob. |
 |
| Push the plastic "prongs" down onto the top of the cylinder. Then push down on the metal "rod" (which has cutting teeth on the end of it). This will cut the kernels off the cob. You can twist the metal rod as you push down or you can just push straight down (if you are strong enough). |
 |
| After you remove the metal "rod", your cob will come out inside the "rod', leaving the kernels of corn in the cylinder. Empty them out into a bowl (if you are freezing them) or empty them directly onto your plate if you have already cooked the corn! |
 |
| You can see the cob sticking out the end of the metal "rod". By placing the yellow "tamper" into the end of the rod, you can force the cob out the other end. |
 |
| Left over cobs. You can see just a tad bit of corn left on the cob (at the small end). If you want to cut that off with a knife, you can. It doesn't leave very much on there though. |
We like to add red bell peppers to our sweet corn. You can do that now, before you freeze it, or you can add them in later when you cook the corn. Your choice and it works fine either way.

**Important Reminder!** If you save the cobs to feed to livestock later on (more than a day later), be sure to keep the cobs in the refrigerator. They can (and will) mold if left at room temperature for over a day. NEVER feed molded cobs to any livestock. It can make them sick.
**Another important reminder!** Never feed anything to someone else's animals, without their permission. Meaning, if you live next to livestock, do NOT just throw this stuff over the fence. You can make the animals very sick. Some of them can be allergic to certain foods, just like you are! ALWAYS ask the owner first, if it's OK to give something to their animals. PLEASE, YOU MUST ALWAYS ASK FIRST!!
That's it for this blog's helpful, time saving hints! Next blog will look at another new appliance I added to the food preserving line-up this summer, a sauce maker! I love it too! Until then, happy freezing and canning! (Next blog due out Monday August 15th.)
Monday, July 18, 2016
New electric water bath canner is a great idea!!
I decided to add an electric water bath canner to my canning equipment this year. I can't tell you enough, what a great idea this was!! It is a HUGE time saver! I purchased it at the end of May/first of June on sale for $99.99 (normally priced at $149.99). I purchased it from Ball. It's one of their FreshTech appliances. Here's the website:
http://www.freshpreserving.com/ball-freshtech-electric-water-bath-canner-%2B-multicooker-1034047VM.html#start=2
I had always used the traditional stovetop water bath canner. This took up so much room on my stovetop, that I honestly couldn't cook or work around it! It also took FOREVER to heat up to boiling and I had to heat up my jars in another appliance.
The new electric canner sits by itself, on your countertop. If you can place it near the sink, that makes clean up even that much faster and easier. Just plug it in and you are ready to go!
You can see the thermostat on the front here. To pre-heat your jars, you set it for medium-high. At this setting, you place your water filled jars into the water bath and let them sit in there to heat up, with the glass lid in place on the canner. When the jars are heated, you are ready to fill them. While you are filling a jar, the others remain in the hot water to keep them heated. When you are ready to fill a jar, you simply remove the jar from the hot water bath, empty the hot water out of the jar, fill the jar with your food item and place your lids on, then replace the filled jar into the water bath canner. When all jars are filled, you turn the thermostat dial to "CANNING" to process the jars. EASY and quick!!
Once all jars are filled, you place this metal "plate" on top of the jars, then place the glass lid on top of the canner and turn the dial to CANNING. Wait for the water to boil (easily seen through the glass lid) and at that time, set your timer for the correct processing time for your recipe. Again, so easy and quick!
When the processing time is complete, turn off the canner, remove the glass lid and metal plate and let the jars stand for 5 minutes. When that time is up, remove the jars from the canner and place on a towel to cool. Let the water cool down in the canner, then if you have placed the canner next to your sink, you simply open the spout on the side to drain the water! Quick, easy and efficient! I LOVE this canner!!
Now I was sold on just these benefits alone. However, it does SO much more! You can also cook with this thing!! Boil seafood, make big pots of soup, make hot holiday drinks (that are easily dispensed through the spout), etc, etc. And no, I do not have any financial interest in either this company or this appliance. I just honestly love this appliance that much!! I am SO happy I found this and decided to try it out!!
Until next time, I hope your summer days are fun and not too hot! Enjoy!! (Next blog will be due out on Monday August 1st. We will discuss freezing corn.)
http://www.freshpreserving.com/ball-freshtech-electric-water-bath-canner-%2B-multicooker-1034047VM.html#start=2
I had always used the traditional stovetop water bath canner. This took up so much room on my stovetop, that I honestly couldn't cook or work around it! It also took FOREVER to heat up to boiling and I had to heat up my jars in another appliance.
 |
| Traditional stovetop water bath canner. |
The new electric canner sits by itself, on your countertop. If you can place it near the sink, that makes clean up even that much faster and easier. Just plug it in and you are ready to go!
 |
| Electric water bath canner box. |
 |
| The electric water bath canner out of the box. |
You can see the thermostat on the front here. To pre-heat your jars, you set it for medium-high. At this setting, you place your water filled jars into the water bath and let them sit in there to heat up, with the glass lid in place on the canner. When the jars are heated, you are ready to fill them. While you are filling a jar, the others remain in the hot water to keep them heated. When you are ready to fill a jar, you simply remove the jar from the hot water bath, empty the hot water out of the jar, fill the jar with your food item and place your lids on, then replace the filled jar into the water bath canner. When all jars are filled, you turn the thermostat dial to "CANNING" to process the jars. EASY and quick!!
 |
| Heated jars in the electric canner, that are in the process of being filled. You can see the 3 empty jars in the foreground. |
Once all jars are filled, you place this metal "plate" on top of the jars, then place the glass lid on top of the canner and turn the dial to CANNING. Wait for the water to boil (easily seen through the glass lid) and at that time, set your timer for the correct processing time for your recipe. Again, so easy and quick!
 |
| The metal "plate" that covers the jars while processing. This helps to distribute the heat more evenly and quickly, plus helps keep your jars in place better during the boiling process. |
When the processing time is complete, turn off the canner, remove the glass lid and metal plate and let the jars stand for 5 minutes. When that time is up, remove the jars from the canner and place on a towel to cool. Let the water cool down in the canner, then if you have placed the canner next to your sink, you simply open the spout on the side to drain the water! Quick, easy and efficient! I LOVE this canner!!
 |
| It's hard to see the black spout on the side, over the edge of the sink, but it's there. Just open it and drain the water into the sink! |
Now I was sold on just these benefits alone. However, it does SO much more! You can also cook with this thing!! Boil seafood, make big pots of soup, make hot holiday drinks (that are easily dispensed through the spout), etc, etc. And no, I do not have any financial interest in either this company or this appliance. I just honestly love this appliance that much!! I am SO happy I found this and decided to try it out!!
Until next time, I hope your summer days are fun and not too hot! Enjoy!! (Next blog will be due out on Monday August 1st. We will discuss freezing corn.)
Tuesday, July 5, 2016
Water bath canning.....
It's that time of season (at least in the south) to start harvesting and preserving those wonderful fresh foods for the upcoming year! Sorry for the delayed post, but I've been covered over with this task lately! Call me naïve if you will, but I've never taken the time to read the labels on salsa and spaghetti sauce bought at the store. They both have sugar in them!! I honestly did not realize that, as when we make our own from scratch, we don't put any sugar in it. We eat a lot of salsa. A LOT. Another wonderful (insert sarcasm here) health issue I have to deal with now is diabetes. So avoidance of sugar is a good thing to do. In light of that, I have decided to can enough salsa to last us a year, plus have a few jars to give to family too. That means at least 14 batches of salsa to can! I've managed to get 11 batches finished so far. I'll hopefully be finishing up the last 3 batches today. Yeah!
The recipe I'm using tastes VERY good, is a bit spicy but not too hot and contains NO sugar! I use a prepared spice package called Mrs. Wages Hot Salsa. I get it from TSC (Tractor Supply), however it is available at many places that sell canning supplies as well.

The complete list of ingredients I use are:
6 1/2 to 7 lbs of fresh tomatoes
6 green onions
2 large jalapeno peppers
1/2 cup of distilled white vinegar
2 TBLS (tablespoons) of lime juice

I begin by washing the tomatoes, onions and peppers. Then I take the skins off the tomatoes. To do this easily, I slice them in half. Place them face down on a cookie sheet and place under the broiler in the oven until the skins start to crinkle and turn dark or blackish. Take them out and place a towel over them for 10 minutes. Then remove the towel and take a pair of tongs to lift the skins right off the tomatoes! It's really that easy! Let the tomatoes cool and then you can chop them up and remove seeds by hand. (Removing the seeds is what takes the longest time for me.)
While the tomatoes are under the broiler, I chop up the green onions. I chop and include in the salsa the green stems too. I also cut the jalapeno peppers in half and take out the seeds, then chop up in small pieces to add to the salsa. If your skin is sensitive, you may want to wear gloves to handle the jalapeno peppers. Also remember, do NOT touch your face (especially your eyes) after handling the peppers. It will burn if you do!!! I have trouble with the air borne properties of the peppers, after I cut them open. It makes me cough and makes it hard for me to breath while I am taking the seeds out. So, I wear a "mask" over my nose and mouth during this part of the process.

The tomatoes should be ready to add to the mixture now. Cut or dice them up, removing as many of the seeds as you can during this process. Mix all the ingredients together in a large mixing bowl. Then place in a large cooking pot and bring to a boil. Once boiling, reduce heat and let simmer for 20 minutes.
During this 20 minutes, start getting your canning jars heated up. Once the simmer is completed, ladle the salsa into heated jars, leaving 1/2 inch head room in the jars. Put on lids and place in canner. You'll process the jars for 40 minutes in a hot water bath canner. Remove the canner from the heat source, remove the canner lid and let the jars sit in the hot water for another 5 minutes. Then remove and sit the jars on a towel for 24 hours. Leave 1-2 inches between jars, so they will cool easier. After 24 hours, check the lids to be sure they've sealed properly. (If not, repeat the canning process for them again with a fresh lid.) This recipe makes between 4-5 pint jars of salsa.

More canning info in the next blog post, due out Monday July 18th! Stay cool out there in this summer heat!
The recipe I'm using tastes VERY good, is a bit spicy but not too hot and contains NO sugar! I use a prepared spice package called Mrs. Wages Hot Salsa. I get it from TSC (Tractor Supply), however it is available at many places that sell canning supplies as well.

The complete list of ingredients I use are:
6 1/2 to 7 lbs of fresh tomatoes
6 green onions
2 large jalapeno peppers
1/2 cup of distilled white vinegar
2 TBLS (tablespoons) of lime juice

I begin by washing the tomatoes, onions and peppers. Then I take the skins off the tomatoes. To do this easily, I slice them in half. Place them face down on a cookie sheet and place under the broiler in the oven until the skins start to crinkle and turn dark or blackish. Take them out and place a towel over them for 10 minutes. Then remove the towel and take a pair of tongs to lift the skins right off the tomatoes! It's really that easy! Let the tomatoes cool and then you can chop them up and remove seeds by hand. (Removing the seeds is what takes the longest time for me.)
 |
| Tomato skins just starting to darken under the broiler. |
 |
| Skins are dark enough and will lift right off with a pair of tongs! |
 |
| When I say to cover with a dish towel, this is exactly what I do for 10 minutes! By doing this, the skins continue to steam for a bit longer and it makes removing them even that much easier. |
While the tomatoes are under the broiler, I chop up the green onions. I chop and include in the salsa the green stems too. I also cut the jalapeno peppers in half and take out the seeds, then chop up in small pieces to add to the salsa. If your skin is sensitive, you may want to wear gloves to handle the jalapeno peppers. Also remember, do NOT touch your face (especially your eyes) after handling the peppers. It will burn if you do!!! I have trouble with the air borne properties of the peppers, after I cut them open. It makes me cough and makes it hard for me to breath while I am taking the seeds out. So, I wear a "mask" over my nose and mouth during this part of the process.

During this 20 minutes, start getting your canning jars heated up. Once the simmer is completed, ladle the salsa into heated jars, leaving 1/2 inch head room in the jars. Put on lids and place in canner. You'll process the jars for 40 minutes in a hot water bath canner. Remove the canner from the heat source, remove the canner lid and let the jars sit in the hot water for another 5 minutes. Then remove and sit the jars on a towel for 24 hours. Leave 1-2 inches between jars, so they will cool easier. After 24 hours, check the lids to be sure they've sealed properly. (If not, repeat the canning process for them again with a fresh lid.) This recipe makes between 4-5 pint jars of salsa.

More canning info in the next blog post, due out Monday July 18th! Stay cool out there in this summer heat!
Monday, June 20, 2016
To breed, or not to breed!
There are as many opinions on this subject, as there are people in the world! Some think that there are too many horses in rescues or going to auctions, so no more breeding should occur. Others think if the mare has a uterus, you should breed her! Then there are many other ideas in between these two extremes.
My own opinion is that you should be a responsible breeder. You should only breed to BETTER the breed. Just because you have a mare, it doesn't mean she should be bred! I also believe that there are a lot of good stallions that would make even better geldings! You should also be prepared to care for those foals that you produce, until you can find them good homes. That's why we only breed a very small number of foals each year. I also feel that breeding in a responsible fashion is necessary. How else will you ensure that the breed continues on? How else can the breed improve? How else will there be quality individuals for future generations to have and enjoy? Breeding just needs to be done in a smaller quantity and with all of these things in mind.
Having said all of that, let's say that you've done some soul searching and have decided to breed your mare. Please make sure that she is breeding sound, before you book your breeding to a stallion! Those stud fees are not refundable (usually) and you want to be sure your mare is healthy from a breeding perspective and that she is breeding sound, before you book your breeding.
So, what does "breeding sound" mean exactly? You'll want the vet to check her ovaries by ultrasound, to be sure she doesn't have any cysts or abnormalities. You'll want her uterus checked too, again to be sure there are no abnormalities present. She'll need a culture done, to be sure no infection is present. Of course she'll need all of her vaccinations to be brought up-to-date, as well as a current negative coggins test if she is to travel to the stud farm for breeding.
Other factors to consider before breeding your mare......how old is she? An older mare (late teens or even twenties) CAN have a foal, but if they haven't foaled for several years, it may be harder to get them pregnant. Is the mare a maiden (never before foaled) mare? If so, how old is she? A maiden mare under 10 years old is not usually a problem. A maiden mare that is over 10 may have trouble getting in foal.
These are not written in stone things of course, but they are things to consider. Your vet may suggest other exams or tests to be done prior to breeding your mare. You may have some extra vet expenses to get the mare bred or keep her pregnant if she gets in foal, to factor in to your breeding budget as well. She may have to stay longer at the breeding farm to achieve a pregnancy or she may not be a good candidate for shipped or frozen semen breeding. If she can't become pregnant or she can't sustain a pregnancy, you may need to consider substitution of a different mare for your breeding and you may not be able to do that until the next spring (if you have already used up your breeding season time frame in the current year). If you do get her in foal, she may need to have her progesterone level supplemented, in order to keep the pregnancy. Some mares require Regumate to do this. This is a costly medication that must be given with care daily. Your vet will check your mare's progesterone level after she is in foal, to see if she needs Regumate or not.
I think the more informed the mare owner is, the easier and more enjoyable the breeding experience will be for them. Go in with eyes wide open! The next blog will go out over the July 2nd weekend. We will revisit gardening and canning in that blog. Until next time, enjoy your summertime!
Sunday, June 5, 2016
Basic Color Genetics for Horses
We've begun our search for a second miniature stallion. Our mini herd sire is 15 years old this year and we will eventually need a younger stallion. While quality is the number one thing for us, we also breed for not-as-common colors. Buckskin pintos are a favorite of ours. Most of our miniature mares are homozygous for tobiano pinto, which means they will always produce a pinto colored foal, no matter what the color of the stallion is. To give us a higher percentage chance of also producing buckskin, we would like to find another buckskin or even a perlino, show quality stallion.
I always find it interesting, that many people do not understand basic horse color genetics. If you're breeding for color or selling a horse "of a different color", I think it's necessary to understand this. If you are selling an animal, it's important to advertise that animal as honestly as you can, which includes providing the prospective buyer with the correct color genetics for that animal!
True story.....when we purchased our first mini driving mare, the seller advertised her as a buckskin. Well of course, that was right up our alley, so we drove several hours to see her. This lovely bay mare comes out and is nuzzling us and stealing her way into our hearts. I ask where the buckskin is and the seller points to this little mare and says that's her! Now folks, this mare is the most normal color of bay you'll ever hope to see! How you could call her a buckskin, is beyond me! The seller was an experienced horse person too. She knew better. I called her on the color and she sheepishly admitted that she knew the mare was a bay, but went on to say (and I quote), "Doesn't buckskin just sound better though?"
I think you'll now understand why the correct color is such a huge pet peeve of mine! Now there CAN be various shades of both bay and buckskin, some being lighter, some being darker, some buckskins more cream based while others are more of a yellow base, but there is usually an obvious "cream" color of some nature, to the buckskin. Here are a couple of our horses, to show a basic bay and a basic buckskin (the buckskin is also a pinto).
So let's go to the beginning of horse colors and genetics. Every foal inherits one chromosome of a genetic pair, from each parent. There are many different genetic pairs that are present, but the parent will only pass on ONE of the chromosomes from each pair to it's offspring. A horse carries 32 genetic pairs. You could easily make a lifetime study of genetics! Here's a nice website to help start making sense of a lot of the color genetics for horses.
https://www.vgl.ucdavis.edu/services/coatcolor.php
For a stripped down, basic introduction to this subject, we'll start here. There are basically two base colors of horses.....either red or black. All other color variations stem from these two base colors.
There is an allele called AGOUTI. You can think of this as the "bay gene". Agouti will only affect a black based horse. If it is present in a black based horse's genetic make-up, it will ALWAYS present itself. Meaning, it won't hide....it will always affect the black horse's coat color. A red horse can carry it and can pass it on to it's offspring, but the agouti doesn't present itself visually on a red horse, so it doesn't change the red horse's coat color. On a black based horse however, the agouti will restrict the black color to the "points" of the horse (the legs, the mane, the tail and the ear tips). This is how you get a bay horse.
There is also a gene called the cream gene. This affects both red and black based horses. If the cream gene is present, it WILL express itself, making the horse's body coat color some form of cream or yellow. There are many different shades of these cream or yellow colors....from darker like almost chocolate, to lighter where you are barely able to see the cream at all because it almost looks white. This would be how you get your palominos and buckskins. A palomino horse is a red based horse that received ONE cream gene from one of it's parents. A palomino will have a white mane and tail. A buckskin horse is a black based horse that also has the agouti allele (so the horse is bay) and they received ONE cream gene from one of their parents. A buckskin will have a black mane and tail. There is another color where the horse receives just ONE cream gene from one of it's parents. In this case, the horse is black and with the cream gene present, it makes the color a smoky black. It's not a true, deep black color, but the black always looks faded. The smoky black horse's mane and tail will be the same faded black color as it's body. This smoky black horse IS capable of passing on the cream gene to it's offspring, so it could produce a buckskin or palomino foal as easily as a palomino or buckskin horse could! You have a 50% chance that any of these will pass the cream gene on to their offspring. All of these single cream gene horses will have dark eyes.
I'm sure most of you have heard of the "double dilute" colors. This simply means that the horse has received TWO cream genes (one from each parent). A double dilute will ALWAYS pass on a cream gene to it's offspring, so will always produce a buckskin, palomino or smokey black foal, regardless of the color of the other parent. If the horse is red based and receives 2 copies of the cream gene, then the resulting horse will be a cremello. If the horse is black based and also carries the agouti allele (so it's a bay horse), and it receives 2 copies of the cream gene, the result will be a perlino. If the horse is a black horse (no agouti) and receives 2 copies of the cream gene, the result will be a smoky cream colored horse. All of these horses will have light colored eyes (usually blue but can be a greenish blue as well).
Then you have other coat enhancers, such as grey. What you ask? Isn't grey a color all by itself?? No, it's not! The horse started out one of the basic coat colors of either red or black. The grey gene will gradually "strip" the color away, making the horse grey or eventually white. Again, there are different shades of grey. Some are almost black, some are snow white. Usually the grey horse will start out darker and lighten each year as they shed out their old winter coat. If a grey gene is present, it WILL express itself eventually! It may take a few years to notice the greying out process begin or it may happen as early as when they lose their foal coat, but it WILL happen. There are also modifiers to the grey gene. You can get a "flea bitten" color, where the horse turns white but looks like they have little freckles or specs all over them. This is called flea bitten grey. They can have dapples present. They can simply go a snowy white color eventually. Some will keep a black mane and tail for several years, before their manes and tails go white. Grey has a lot of variations, but just know that if that grey gene is present it will ALWAYS present itself and it works on ANY coat color (red, black, palomino, perlino, etc, etc.).
Then you have the pinto pattern of colors. This is another coat enhancer that gives the horse large white spots, or blocks of white color, over their bodies. They can have a lot of white, where you see only a small amount of their original coat color (usually seen on the head or neck region in horses like this) or they can be mostly their original coat color with a very small white patch located somewhere on the body or they can be anywhere in between these extremes. If the pinto gene is present, it will always present itself as well. In a horse that carries only ONE pinto gene, it has a 50% chance of passing the pinto coloration on to it's offspring. If the horse has TWO pinto genes, it is said to be homozygous for that pinto color and will ALWAYS produce a pinto foal, no matter what color the other parent is.
This blog discussion has just touched the tip of the iceberg on color genetics for horses! There are many, many other coat enhancers that I haven't even begun to mention! I think the main message I want to impart, is to ALWAYS take the time to color test your horse if you have a "horse of a different color". Until next time..... (remember, blog updates are every 2 weeks for the summer).
I always find it interesting, that many people do not understand basic horse color genetics. If you're breeding for color or selling a horse "of a different color", I think it's necessary to understand this. If you are selling an animal, it's important to advertise that animal as honestly as you can, which includes providing the prospective buyer with the correct color genetics for that animal!
True story.....when we purchased our first mini driving mare, the seller advertised her as a buckskin. Well of course, that was right up our alley, so we drove several hours to see her. This lovely bay mare comes out and is nuzzling us and stealing her way into our hearts. I ask where the buckskin is and the seller points to this little mare and says that's her! Now folks, this mare is the most normal color of bay you'll ever hope to see! How you could call her a buckskin, is beyond me! The seller was an experienced horse person too. She knew better. I called her on the color and she sheepishly admitted that she knew the mare was a bay, but went on to say (and I quote), "Doesn't buckskin just sound better though?"
 |
| This is the mini mare we bought.....truly a bay, not a buckskin by any stretch of the imagination! |
I think you'll now understand why the correct color is such a huge pet peeve of mine! Now there CAN be various shades of both bay and buckskin, some being lighter, some being darker, some buckskins more cream based while others are more of a yellow base, but there is usually an obvious "cream" color of some nature, to the buckskin. Here are a couple of our horses, to show a basic bay and a basic buckskin (the buckskin is also a pinto).
 |
| Basic bay. Reddish-brownish body color with black points (mane, tail, lower legs black). |
 |
| Basic, medium cream color, buckskin. Cream (or yellow) colored body with black points (mane, tail, lower legs black). He's also a pinto, which is what creates the white spots on his body/mane/tail and he has 4 white stockings, which is why his legs aren't black. |
https://www.vgl.ucdavis.edu/services/coatcolor.php
For a stripped down, basic introduction to this subject, we'll start here. There are basically two base colors of horses.....either red or black. All other color variations stem from these two base colors.
 |
| A chestnut (red) pinto miniature mare. |
 |
| A black egyptian arabian stallion, Amir Ibn Inshalla. |
There is an allele called AGOUTI. You can think of this as the "bay gene". Agouti will only affect a black based horse. If it is present in a black based horse's genetic make-up, it will ALWAYS present itself. Meaning, it won't hide....it will always affect the black horse's coat color. A red horse can carry it and can pass it on to it's offspring, but the agouti doesn't present itself visually on a red horse, so it doesn't change the red horse's coat color. On a black based horse however, the agouti will restrict the black color to the "points" of the horse (the legs, the mane, the tail and the ear tips). This is how you get a bay horse.
There is also a gene called the cream gene. This affects both red and black based horses. If the cream gene is present, it WILL express itself, making the horse's body coat color some form of cream or yellow. There are many different shades of these cream or yellow colors....from darker like almost chocolate, to lighter where you are barely able to see the cream at all because it almost looks white. This would be how you get your palominos and buckskins. A palomino horse is a red based horse that received ONE cream gene from one of it's parents. A palomino will have a white mane and tail. A buckskin horse is a black based horse that also has the agouti allele (so the horse is bay) and they received ONE cream gene from one of their parents. A buckskin will have a black mane and tail. There is another color where the horse receives just ONE cream gene from one of it's parents. In this case, the horse is black and with the cream gene present, it makes the color a smoky black. It's not a true, deep black color, but the black always looks faded. The smoky black horse's mane and tail will be the same faded black color as it's body. This smoky black horse IS capable of passing on the cream gene to it's offspring, so it could produce a buckskin or palomino foal as easily as a palomino or buckskin horse could! You have a 50% chance that any of these will pass the cream gene on to their offspring. All of these single cream gene horses will have dark eyes.
I'm sure most of you have heard of the "double dilute" colors. This simply means that the horse has received TWO cream genes (one from each parent). A double dilute will ALWAYS pass on a cream gene to it's offspring, so will always produce a buckskin, palomino or smokey black foal, regardless of the color of the other parent. If the horse is red based and receives 2 copies of the cream gene, then the resulting horse will be a cremello. If the horse is black based and also carries the agouti allele (so it's a bay horse), and it receives 2 copies of the cream gene, the result will be a perlino. If the horse is a black horse (no agouti) and receives 2 copies of the cream gene, the result will be a smoky cream colored horse. All of these horses will have light colored eyes (usually blue but can be a greenish blue as well).
 | ||||
| MSMF Vanilla Dreams, a Morgan cremello filly (the smaller one shown) owned by Kara Criner. Photo courtesy of Sue White, taken from the MorganColors.com website. Notice her mane and tail are both white. |
 |
| A perlino pinto yearling saddlebred filly, named DW Carolina Golden Fire. Look closely for the perlino colored spots on her head, shoulder/neck and flank areas. You can see the little bit of her mane that is flipped over on this side of her neck. See how it has an orange tint to it? This is very common for a perlino's mane and tail color. |
 |
| Azariahs Mister Maestro, a smoky black pinto stallion owned by Azariah Miniatures in PA. |
Then you have other coat enhancers, such as grey. What you ask? Isn't grey a color all by itself?? No, it's not! The horse started out one of the basic coat colors of either red or black. The grey gene will gradually "strip" the color away, making the horse grey or eventually white. Again, there are different shades of grey. Some are almost black, some are snow white. Usually the grey horse will start out darker and lighten each year as they shed out their old winter coat. If a grey gene is present, it WILL express itself eventually! It may take a few years to notice the greying out process begin or it may happen as early as when they lose their foal coat, but it WILL happen. There are also modifiers to the grey gene. You can get a "flea bitten" color, where the horse turns white but looks like they have little freckles or specs all over them. This is called flea bitten grey. They can have dapples present. They can simply go a snowy white color eventually. Some will keep a black mane and tail for several years, before their manes and tails go white. Grey has a lot of variations, but just know that if that grey gene is present it will ALWAYS present itself and it works on ANY coat color (red, black, palomino, perlino, etc, etc.).
Then you have the pinto pattern of colors. This is another coat enhancer that gives the horse large white spots, or blocks of white color, over their bodies. They can have a lot of white, where you see only a small amount of their original coat color (usually seen on the head or neck region in horses like this) or they can be mostly their original coat color with a very small white patch located somewhere on the body or they can be anywhere in between these extremes. If the pinto gene is present, it will always present itself as well. In a horse that carries only ONE pinto gene, it has a 50% chance of passing the pinto coloration on to it's offspring. If the horse has TWO pinto genes, it is said to be homozygous for that pinto color and will ALWAYS produce a pinto foal, no matter what color the other parent is.
 |
| A pinto that has minimal white. See the white spot on his croup/butt? The white spots extends to his tail as well, making his tail both white and black. He is a buckskin that is about 90% base coat color and 10% white. This is Back in a Flash, a homozygous tobiano pinto, saddlebred gelding. |
 |
| A pinto that has mostly a white body with the base color (which is buckskin) restricted to his head and underneath his neck. This is a miniature colt named DVM Grand Bazinga. He does have one blue eye, which goes into a discussion for a different day! This blue eye is NOT caused by being a double dilute. His other eye is dark. |
 |
| A pinto that shows about 65-70% base coat color (black) and 30-35% white. This is a National Show Horse named DW Keyper of the Legacy. |
This blog discussion has just touched the tip of the iceberg on color genetics for horses! There are many, many other coat enhancers that I haven't even begun to mention! I think the main message I want to impart, is to ALWAYS take the time to color test your horse if you have a "horse of a different color". Until next time..... (remember, blog updates are every 2 weeks for the summer).
Subscribe to:
Posts (Atom)