http://www.freshpreserving.com/ball-freshtech-electric-water-bath-canner-%2B-multicooker-1034047VM.html#start=2
I had always used the traditional stovetop water bath canner. This took up so much room on my stovetop, that I honestly couldn't cook or work around it! It also took FOREVER to heat up to boiling and I had to heat up my jars in another appliance.
 |
| Traditional stovetop water bath canner. |
The new electric canner sits by itself, on your countertop. If you can place it near the sink, that makes clean up even that much faster and easier. Just plug it in and you are ready to go!
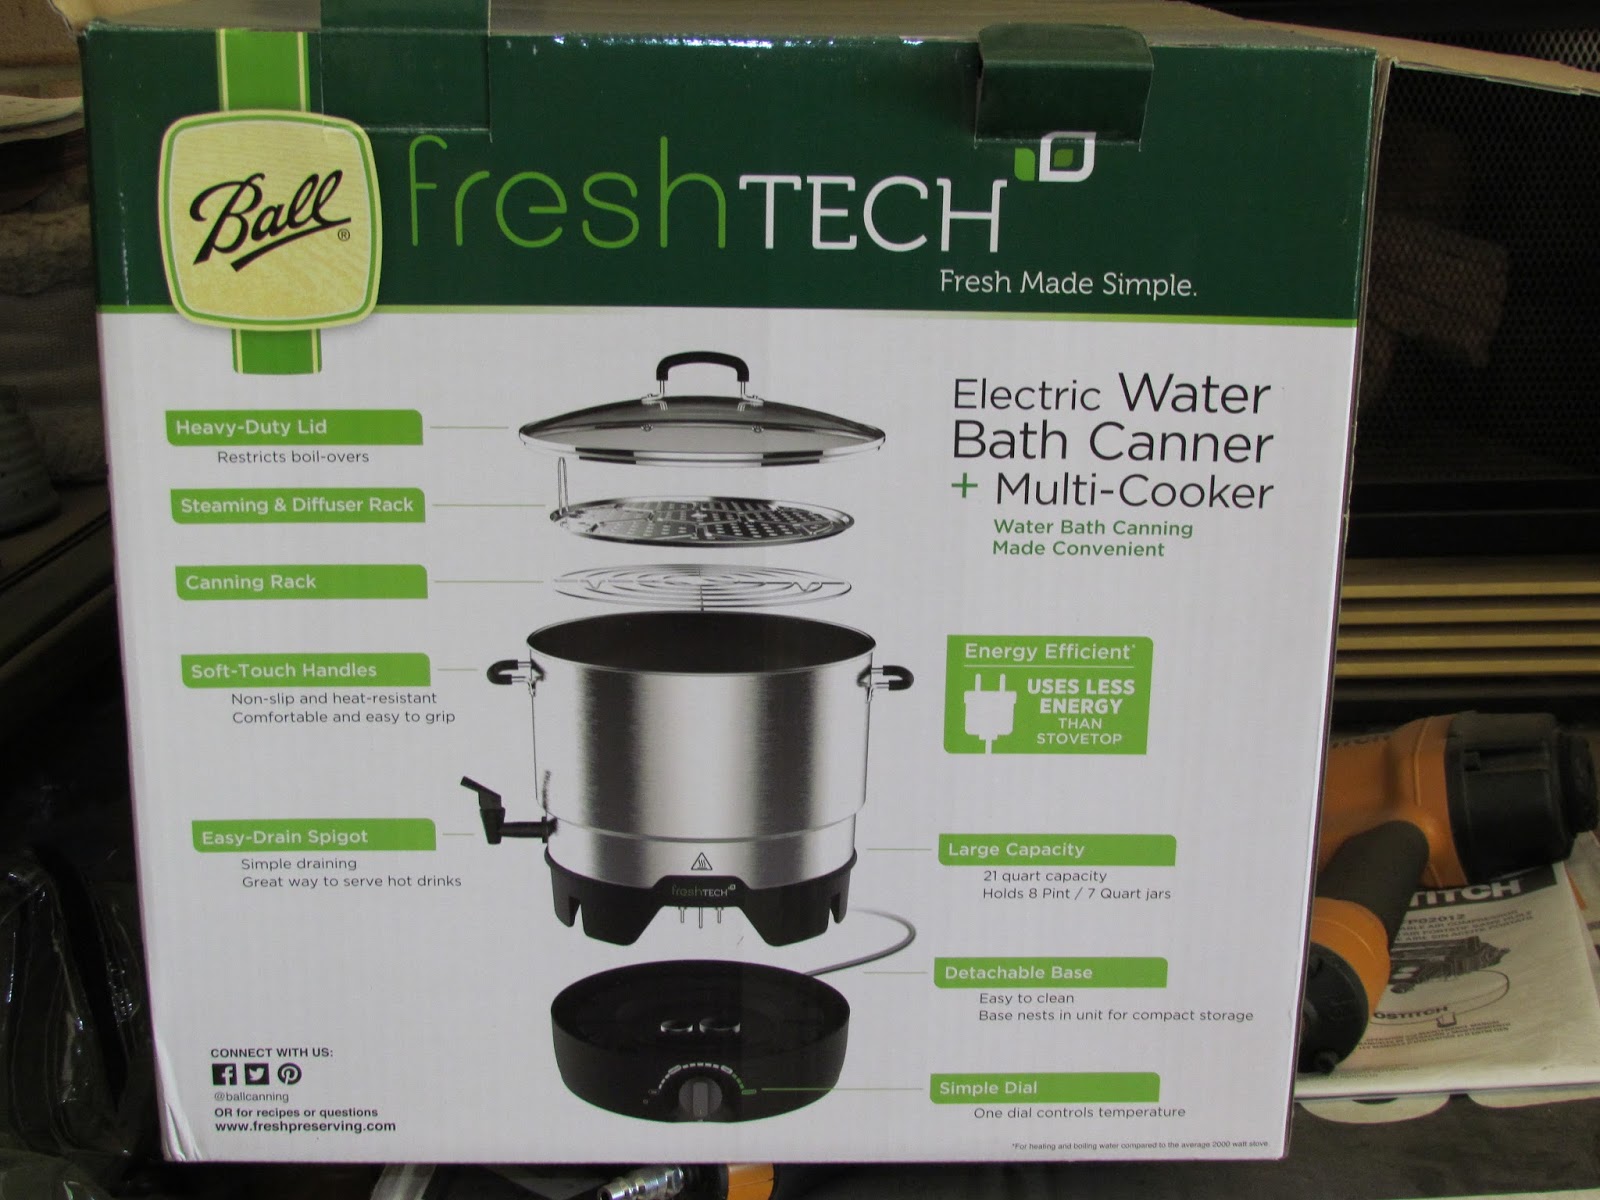 |
| Electric water bath canner box. |
 |
| The electric water bath canner out of the box. |
You can see the thermostat on the front here. To pre-heat your jars, you set it for medium-high. At this setting, you place your water filled jars into the water bath and let them sit in there to heat up, with the glass lid in place on the canner. When the jars are heated, you are ready to fill them. While you are filling a jar, the others remain in the hot water to keep them heated. When you are ready to fill a jar, you simply remove the jar from the hot water bath, empty the hot water out of the jar, fill the jar with your food item and place your lids on, then replace the filled jar into the water bath canner. When all jars are filled, you turn the thermostat dial to "CANNING" to process the jars. EASY and quick!!
 |
| Heated jars in the electric canner, that are in the process of being filled. You can see the 3 empty jars in the foreground. |
Once all jars are filled, you place this metal "plate" on top of the jars, then place the glass lid on top of the canner and turn the dial to CANNING. Wait for the water to boil (easily seen through the glass lid) and at that time, set your timer for the correct processing time for your recipe. Again, so easy and quick!
 |
| The metal "plate" that covers the jars while processing. This helps to distribute the heat more evenly and quickly, plus helps keep your jars in place better during the boiling process. |
When the processing time is complete, turn off the canner, remove the glass lid and metal plate and let the jars stand for 5 minutes. When that time is up, remove the jars from the canner and place on a towel to cool. Let the water cool down in the canner, then if you have placed the canner next to your sink, you simply open the spout on the side to drain the water! Quick, easy and efficient! I LOVE this canner!!
 |
| It's hard to see the black spout on the side, over the edge of the sink, but it's there. Just open it and drain the water into the sink! |
Now I was sold on just these benefits alone. However, it does SO much more! You can also cook with this thing!! Boil seafood, make big pots of soup, make hot holiday drinks (that are easily dispensed through the spout), etc, etc. And no, I do not have any financial interest in either this company or this appliance. I just honestly love this appliance that much!! I am SO happy I found this and decided to try it out!!
Until next time, I hope your summer days are fun and not too hot! Enjoy!! (Next blog will be due out on Monday August 1st. We will discuss freezing corn.)
No comments:
Post a Comment